Information to Dock Element Command
The dock element command is often placed at the top right corner of the PerDock title bar with corresponding command icon. And users can perform the command function by clicking the command icon. The PerDock control allows you to add built-in commands or your own custom commands.
From this online tutorial page, you will not only learn how to add combined built-in commands to the PerDock control but also know how to integrate custom commands to the PerDock control. Built-in Commands
The PerDock control offers several built-in commands which will perform function without any programming from developers. And you can use these built-in commands with the corresponding properties.
Here we provide two programming examples for you on how to use these built-in commands. <kettic:PerDock runat="server" ID="PerDock1" Title="ExpandCollapse + Close" EnableRoundedCorners="true">
Screenshot of above programming example. 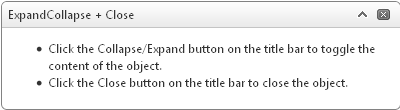 <kettic:PerDock runat="server" ID="PerDock2" DefaultCommands="PinUnpin,Close" Title="PinUnpin + Close"
Screenshot of above programming example. 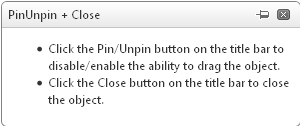 Custom Commands
If above built-in commands can not meet your needs, you can add your own command to the dock title bar by using the Command property. Following sample code will show you how to add custom command to the PerDock control. <kettic:PerDock runat="server" ID="PerDock3" Title="Custom Commands + Close" EnableRoundedCorners="true">
Screenshot of above programming example. 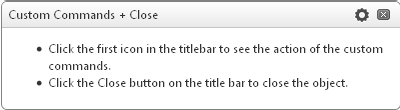 Related Dock Element Tutorials
Apart from customizing dock element command in aspx web page, we also offer guidance on how to create custom dock command using C#.NET programming code. | 
ASP.NET AJAX UI Controls ASP.NET AJAX Chart UI Control ASP.NET AJAX Grid UI Control ASP.NET AJAX Barcode UI Control ASP.NET AJAX Button UI Control ASP.NET AJAX Calendar UI Control ASP.NET AJAX NavigationBar UI Control ASP.NET AJAX Captcha UI Control ASP.NET AJAX Color Editor UI Control ASP.NET AJAX ComboBox UI Control ASP.NET AJAX DataPager UI Control ASP.NET AJAX Dock UI Control OverviewGetting StartedElement ZonesCommands Templates TemplatesClient Prpgramming Dock EventServer Programming Dock EventASP.NET AJAX DropDownList UI Control ASP.NET AJAX DropDownTree UI Control ASP.NET AJAX HtmlEditor UI Control ASP.NET AJAX FileManager UI Control ASP.NET AJAX Filter UI Control ASP.NET AJAX Input UI Control ASP.NET AJAX ListBox UI Control ASP.NET AJAX ListView UI Control ASP.NET AJAX ToolBar UI Control ASP.NET AJAX TabControl UI Control ASP.NET AJAX Menu UI Control ASP.NET AJAX ToolTip UI Control |
 ). On the contrary, there will be a single Collapse icon showing on the PerDock title bar when the PerDock control shows its content area. And you can minimize the PerDock control by clicking the Collapse command icon(
 ).
).  ), similar to a deletion sign, showing in the PerDock title bar. The PerDock control will exit from the web page once the user click this Close command icon.
  ). there will be a single Unpin command icon on the dock title bar when the PerDock Control is pinned. And the PerDock control can be movable if you click the Unpin command icon(
 ).
).