From this tutorial, we will offer you a brief guidance on how to create and add a simple button to a web page using ASP.NET AJAX Button UI step by step. The whole process of building a button to web page contains three major parts, which are creating ASP.NET web application, adding button control to web page and setting properties of added button control. Create an ASP.NET Web Application
Here we provide you a screen shot for this step. 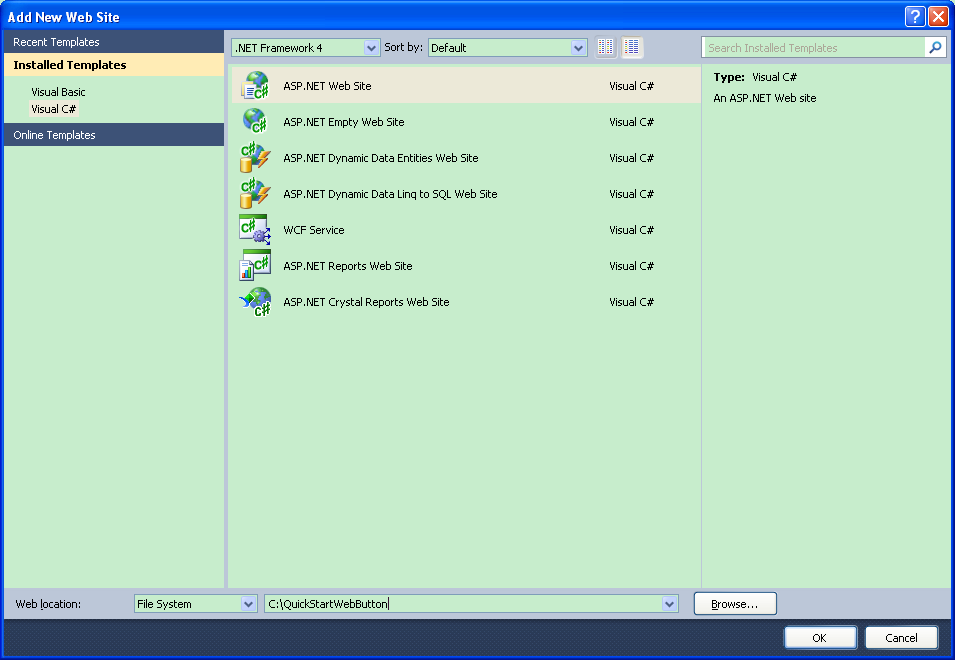 Add Button Control to Page
Before this step, please make sure that your ASP.NET web application has installed .NET Framework 3.5 or later versions and that you have successfully installed all necessary AJAX dlls from our ASP.NET AJAX SDK into your Visual Studio. After you finish above works, you can add button control to page within following two steps.
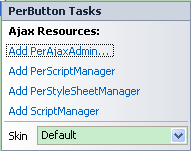
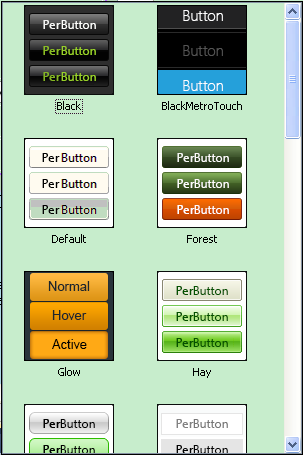
Custom Button Properties
After you add the button control to above ASP.NET web page, you can re-set the properties and appearance of that button control at your wish. And now we will offer you detailed instructions for this operation.
Now a simple button control will be successfully added to an asp.net web page. If you have any problem in the process of implementing these steps, please feel free to contact us. | 
ASP.NET AJAX UI Controls ASP.NET AJAX Chart UI Control ASP.NET AJAX Grid UI Control ASP.NET AJAX Barcode UI Control ASP.NET AJAX Button UI Control OverviewGetting Started Button Type Standard ButtonIcon ButtonImage ButtonLink ButtonToggle ButtonSplit ButtonClient Prpgramming Button EventServer Programming Button EventASP.NET AJAX Calendar UI Control ASP.NET AJAX NavigationBar UI Control ASP.NET AJAX Captcha UI Control ASP.NET AJAX Color Editor UI Control ASP.NET AJAX ComboBox UI Control ASP.NET AJAX DataPager UI Control ASP.NET AJAX Dock UI Control ASP.NET AJAX DropDownList UI Control ASP.NET AJAX DropDownTree UI Control ASP.NET AJAX HtmlEditor UI Control ASP.NET AJAX FileManager UI Control ASP.NET AJAX Filter UI Control ASP.NET AJAX Input UI Control ASP.NET AJAX ListBox UI Control ASP.NET AJAX ListView UI Control ASP.NET AJAX ToolBar UI Control ASP.NET AJAX TabControl UI Control ASP.NET AJAX Menu UI Control ASP.NET AJAX ToolTip UI Control |